Welcome Back!!!
Congratulations! You've picked an open source project to contribute to and you're ready to start making a difference(Need a refresher? Check out this post . )! But before we can celebrate, you'll need to learn about one of the most essential tools in your open source contributor's toolkit: the pull request! So grab a snack and open that Google Doc (or whatever word-processing software you use), because

What the heck is a Pull Request?
Before I let you go and be "pull request happy", let's define what a pull request is. It's when you add your suggestion to an open source project via a line of code.

Think of it as a software development version of putting your comments onto a shared Google Doc or presentation for a group project for school. It's essential in the open source contribution process because your line of code impacts how the project functions. Now that's settled, on to making your first pull request!

Creating a Pull Request
Now there are so many methods to making a PR(these are the initials for pull requests), but here are steps that I find helpful.
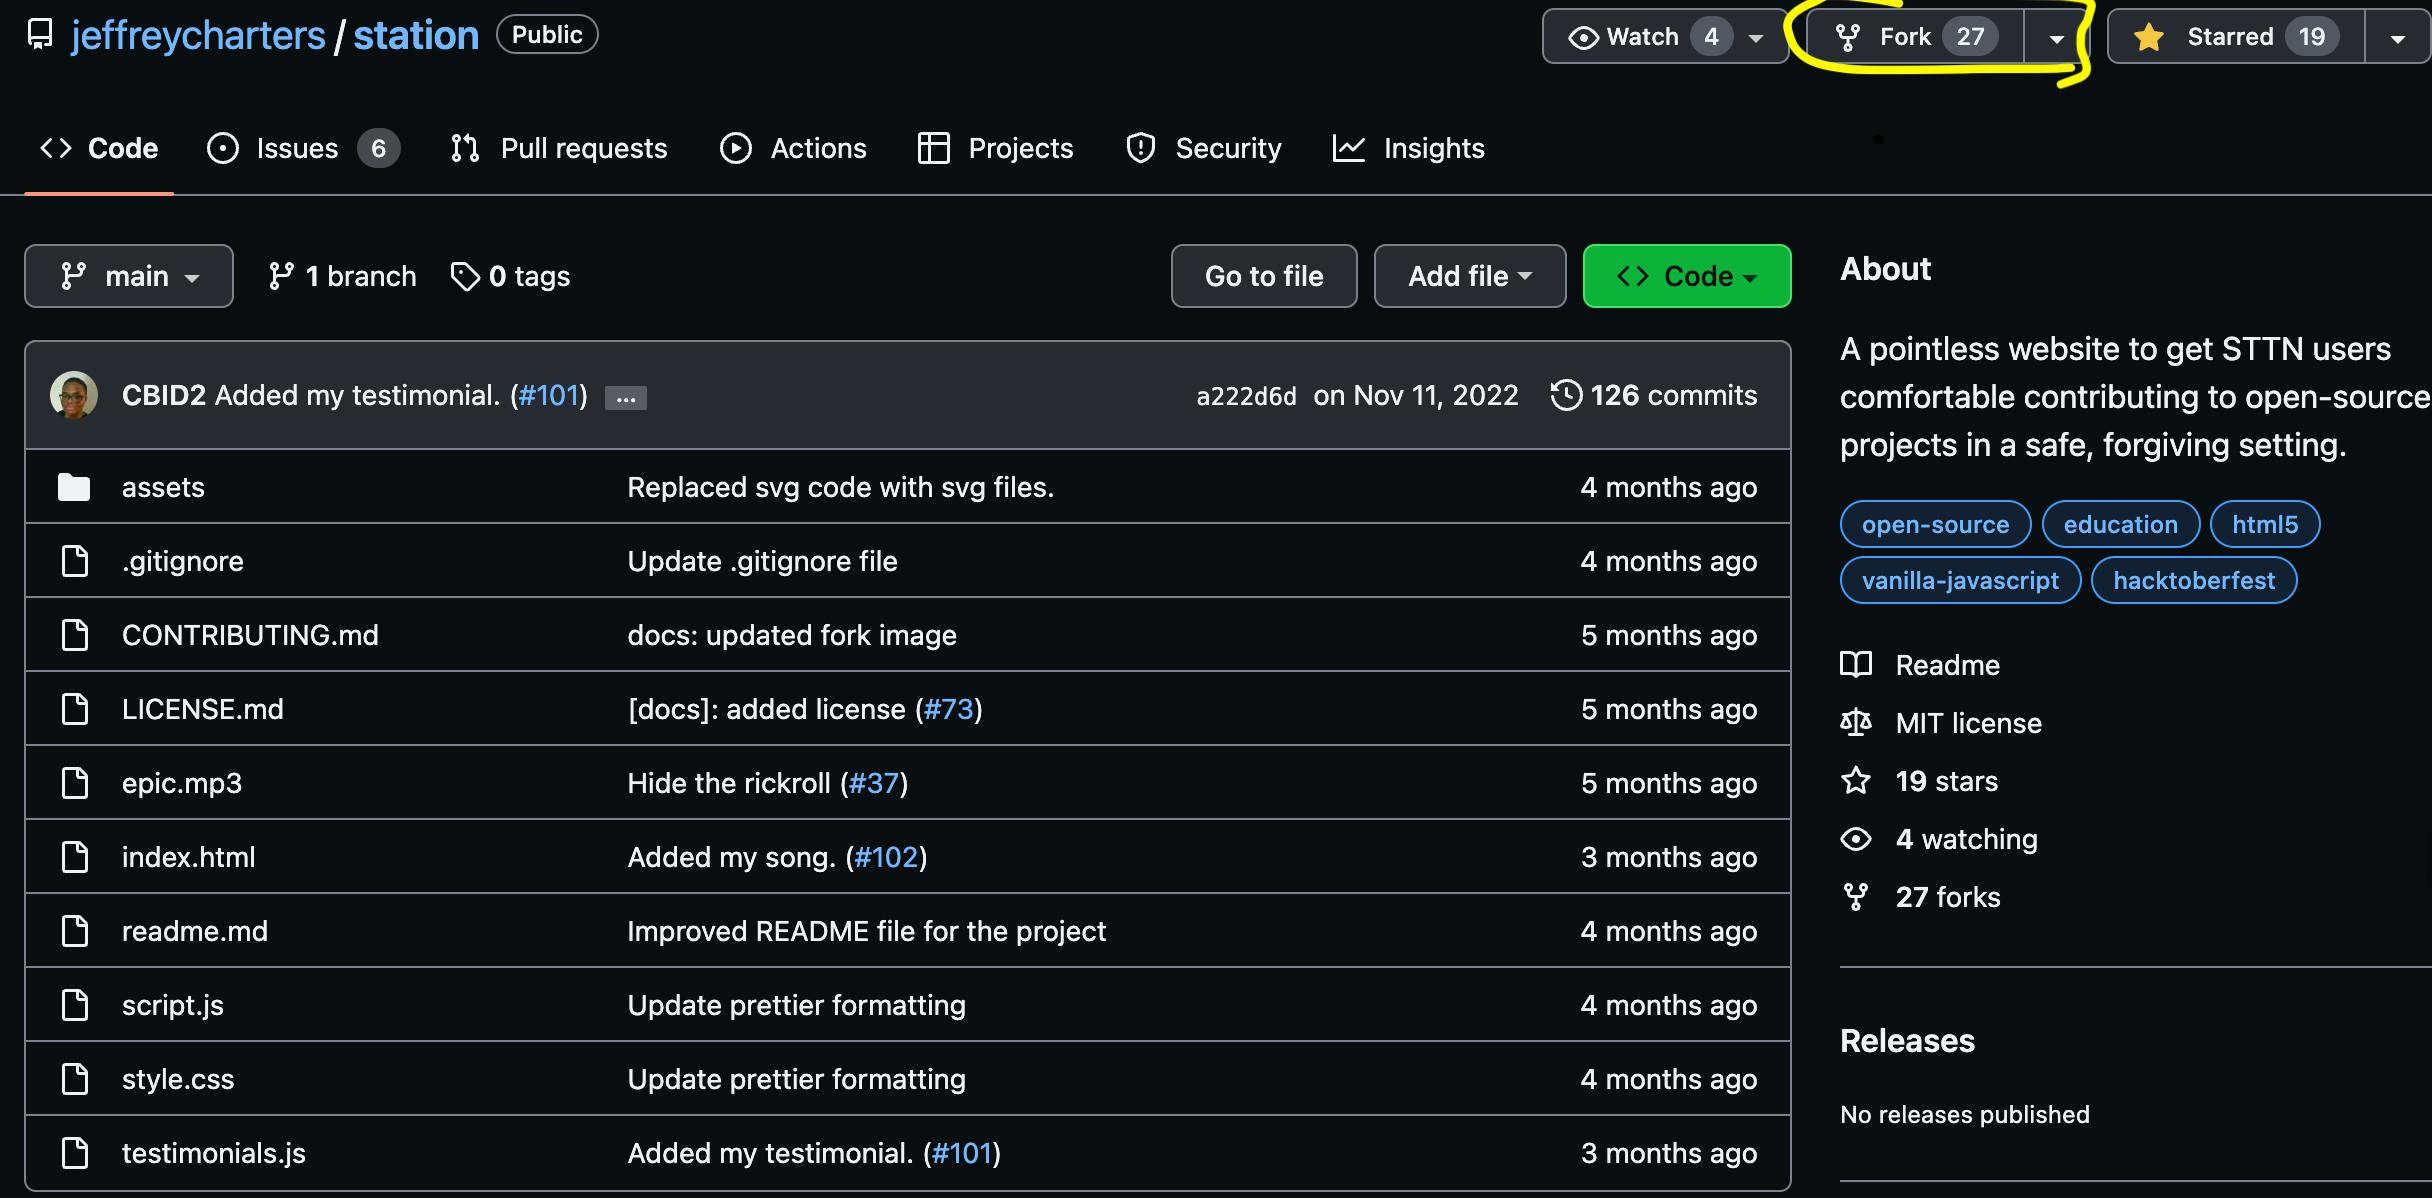
1. Fork the project's repository
Make your desired changes to the code or documentation
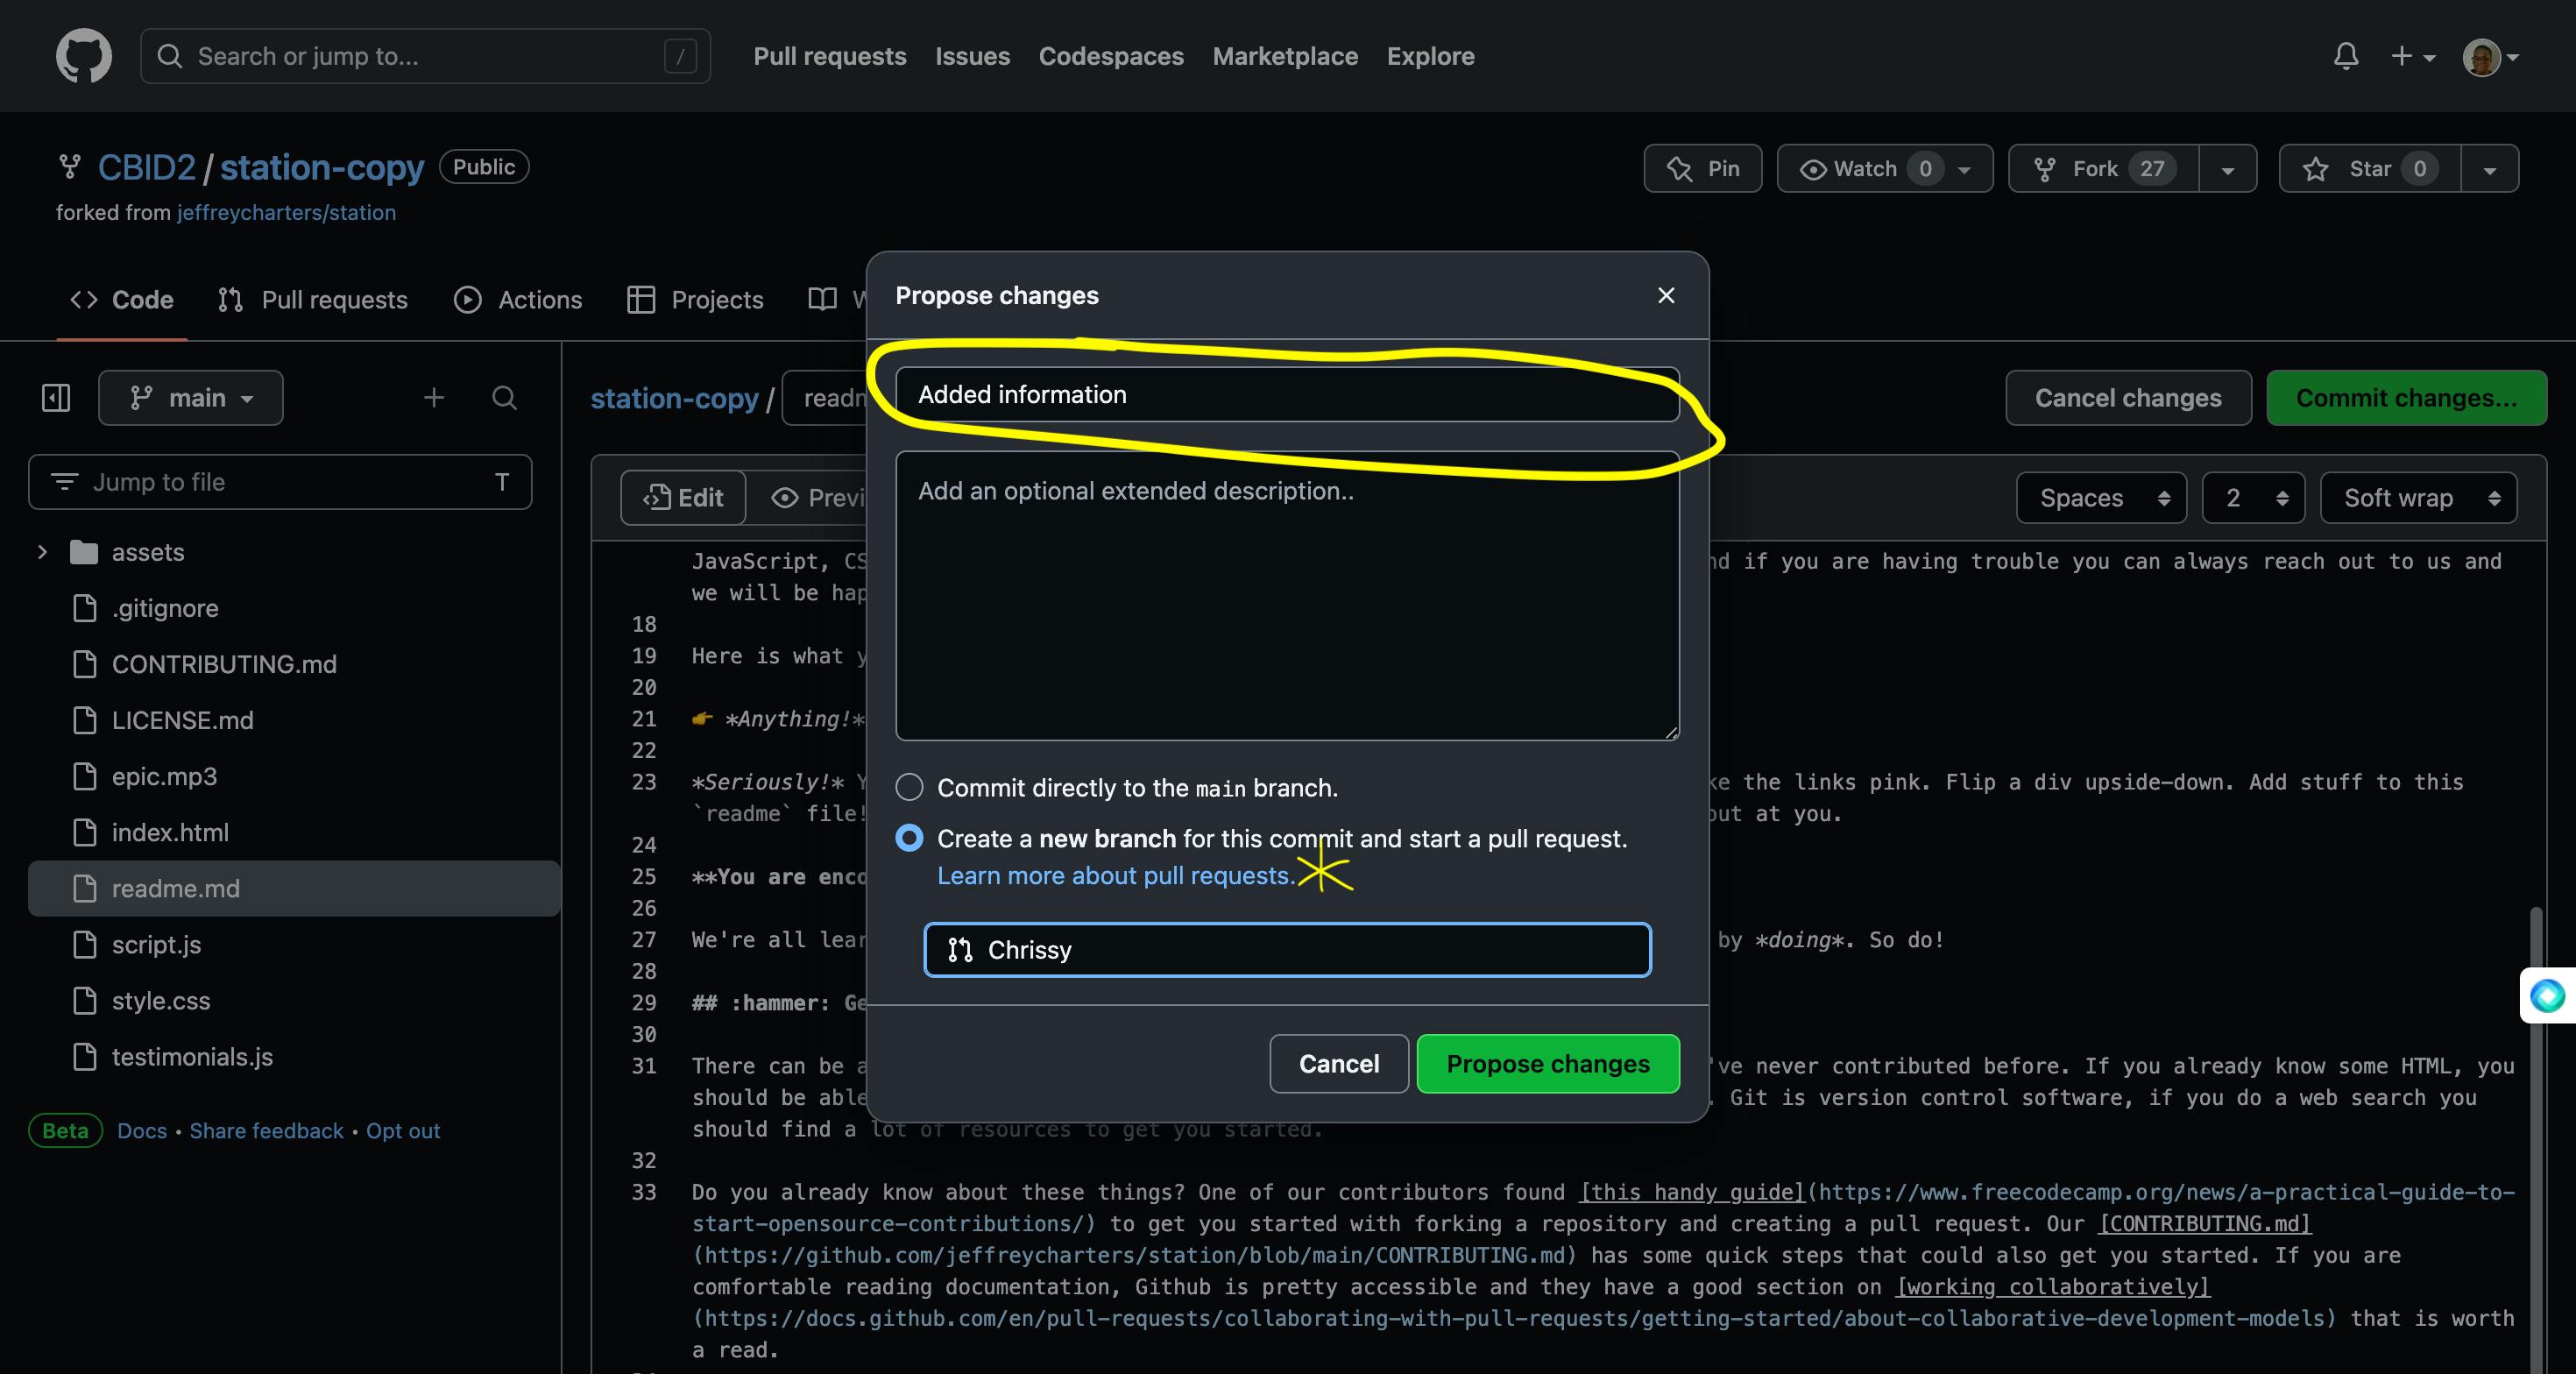
Click on Commit Changes

- Add your message in the commit message textbox, pick the Create a new branch for this commit and start a pull request option, and click on Propose changes.
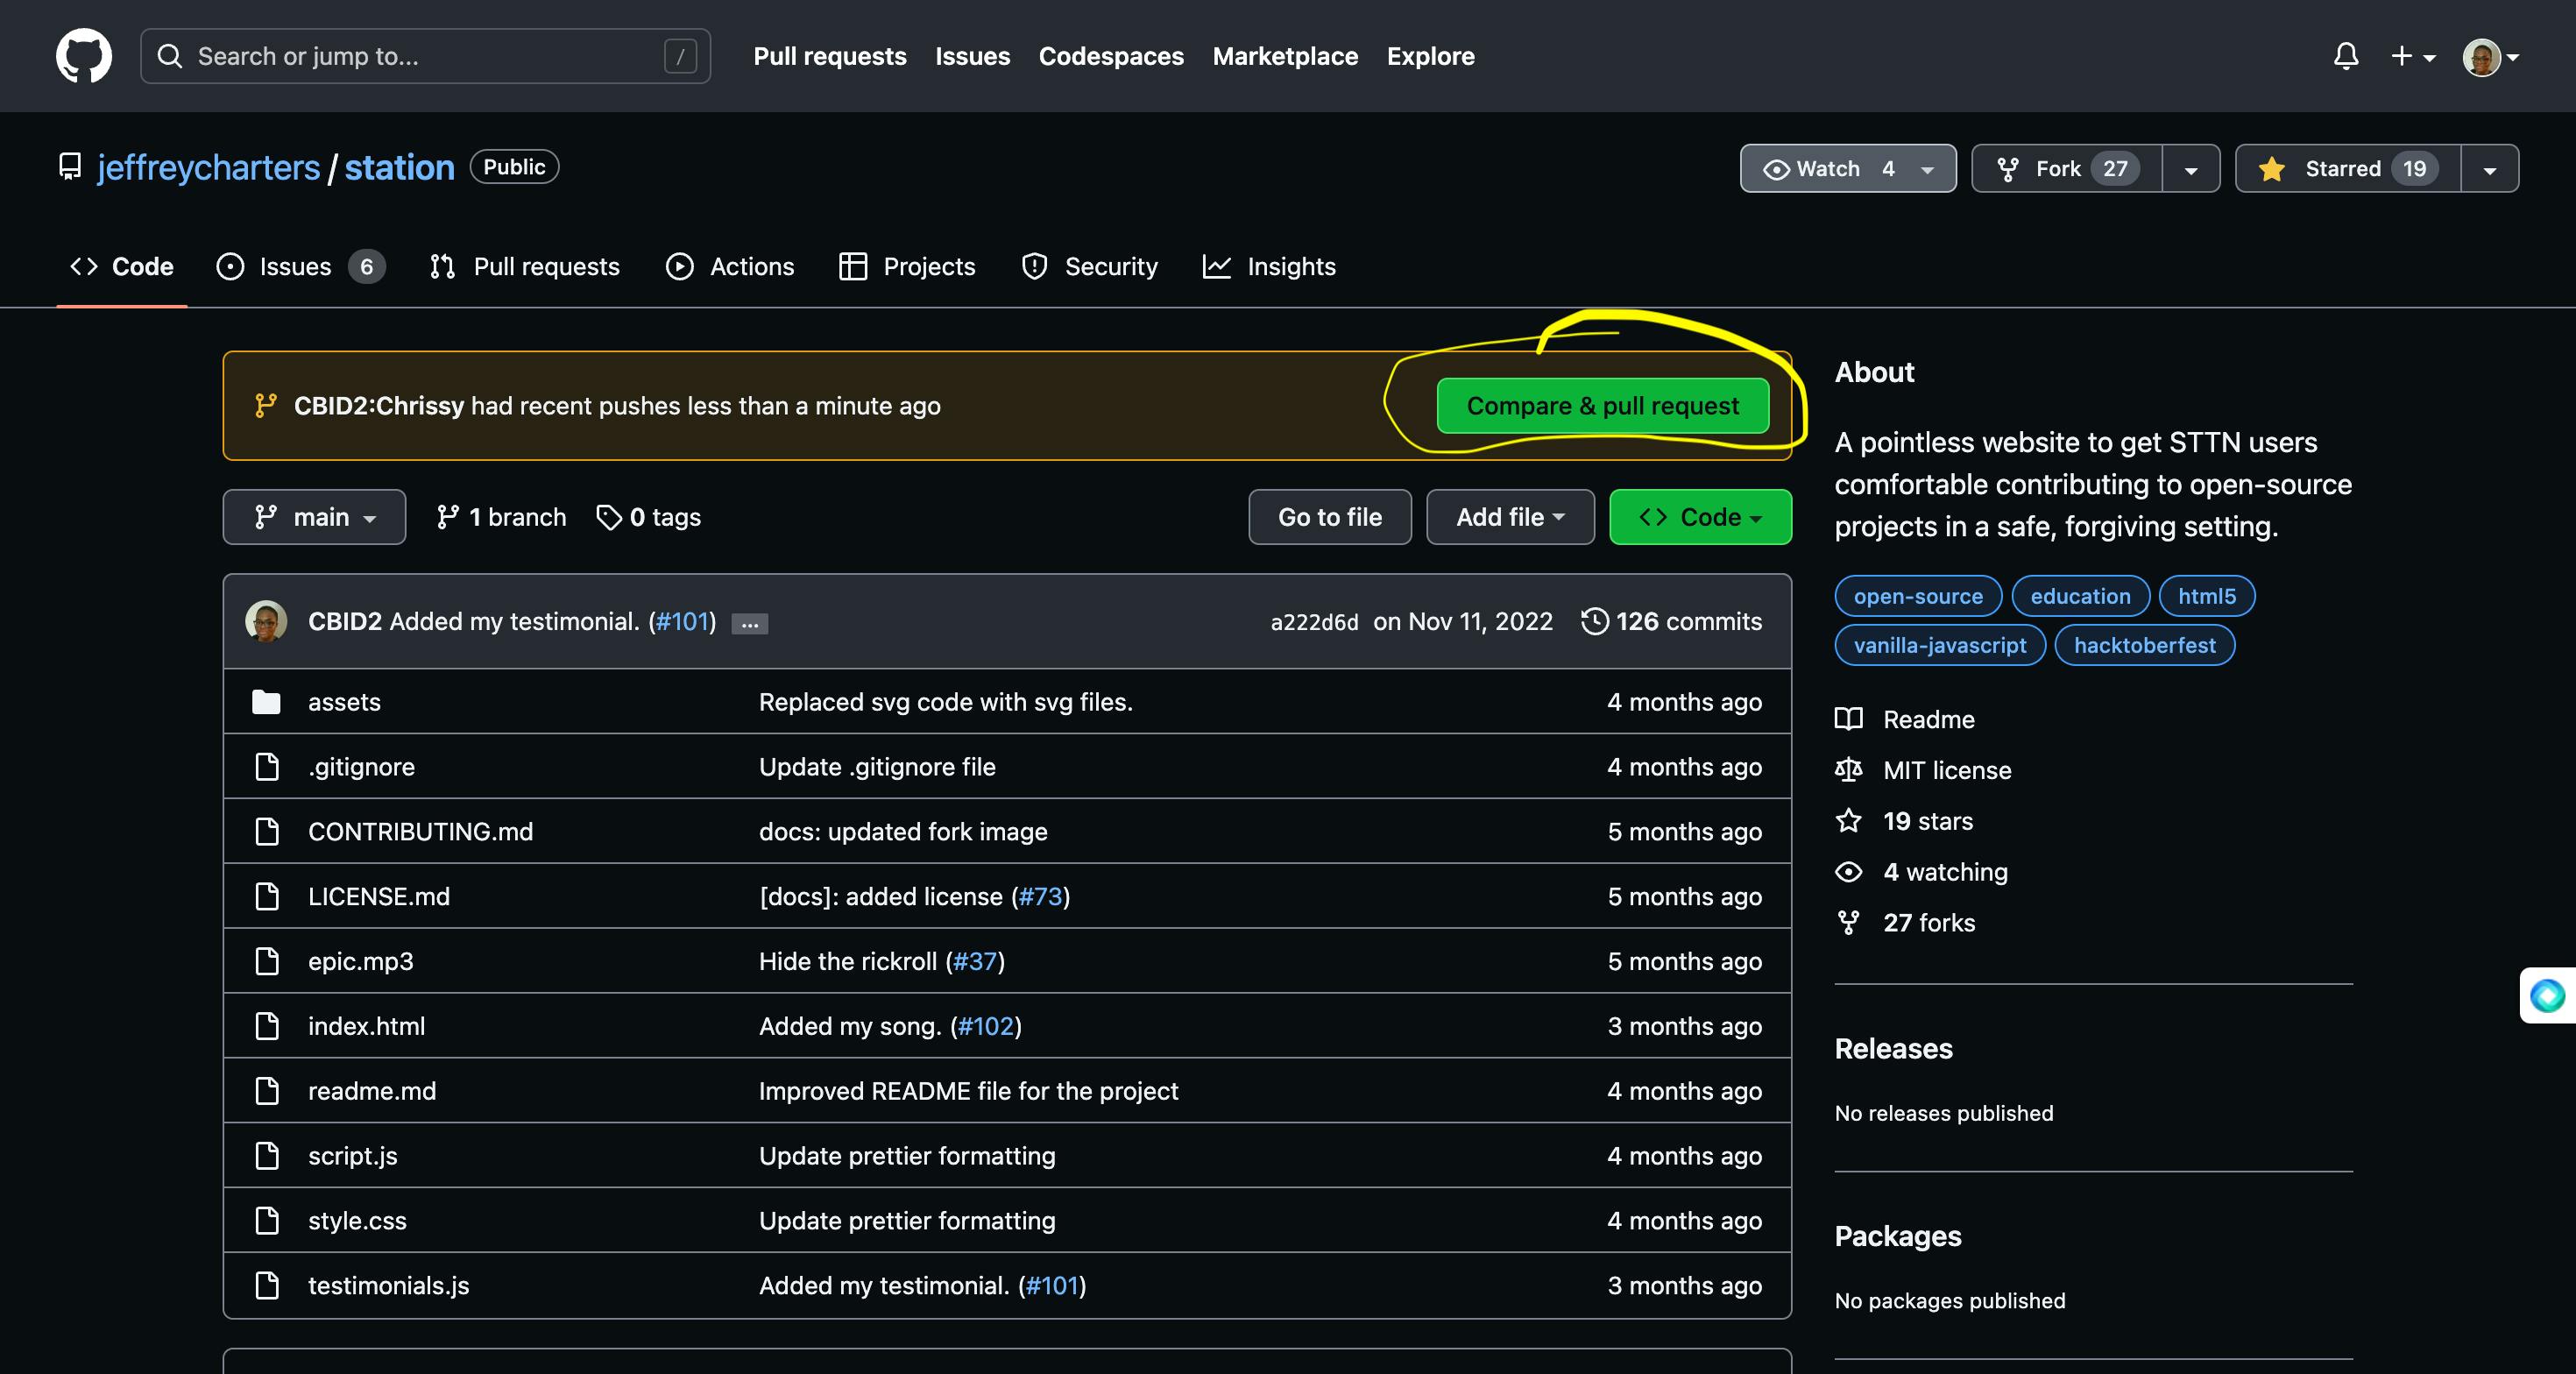
- Go to the project’s repository and click on Compare & Pull Request
- Describe your changes in the pull request form, click on Create Pull Request, and wait for feedback from the project’s maintainers
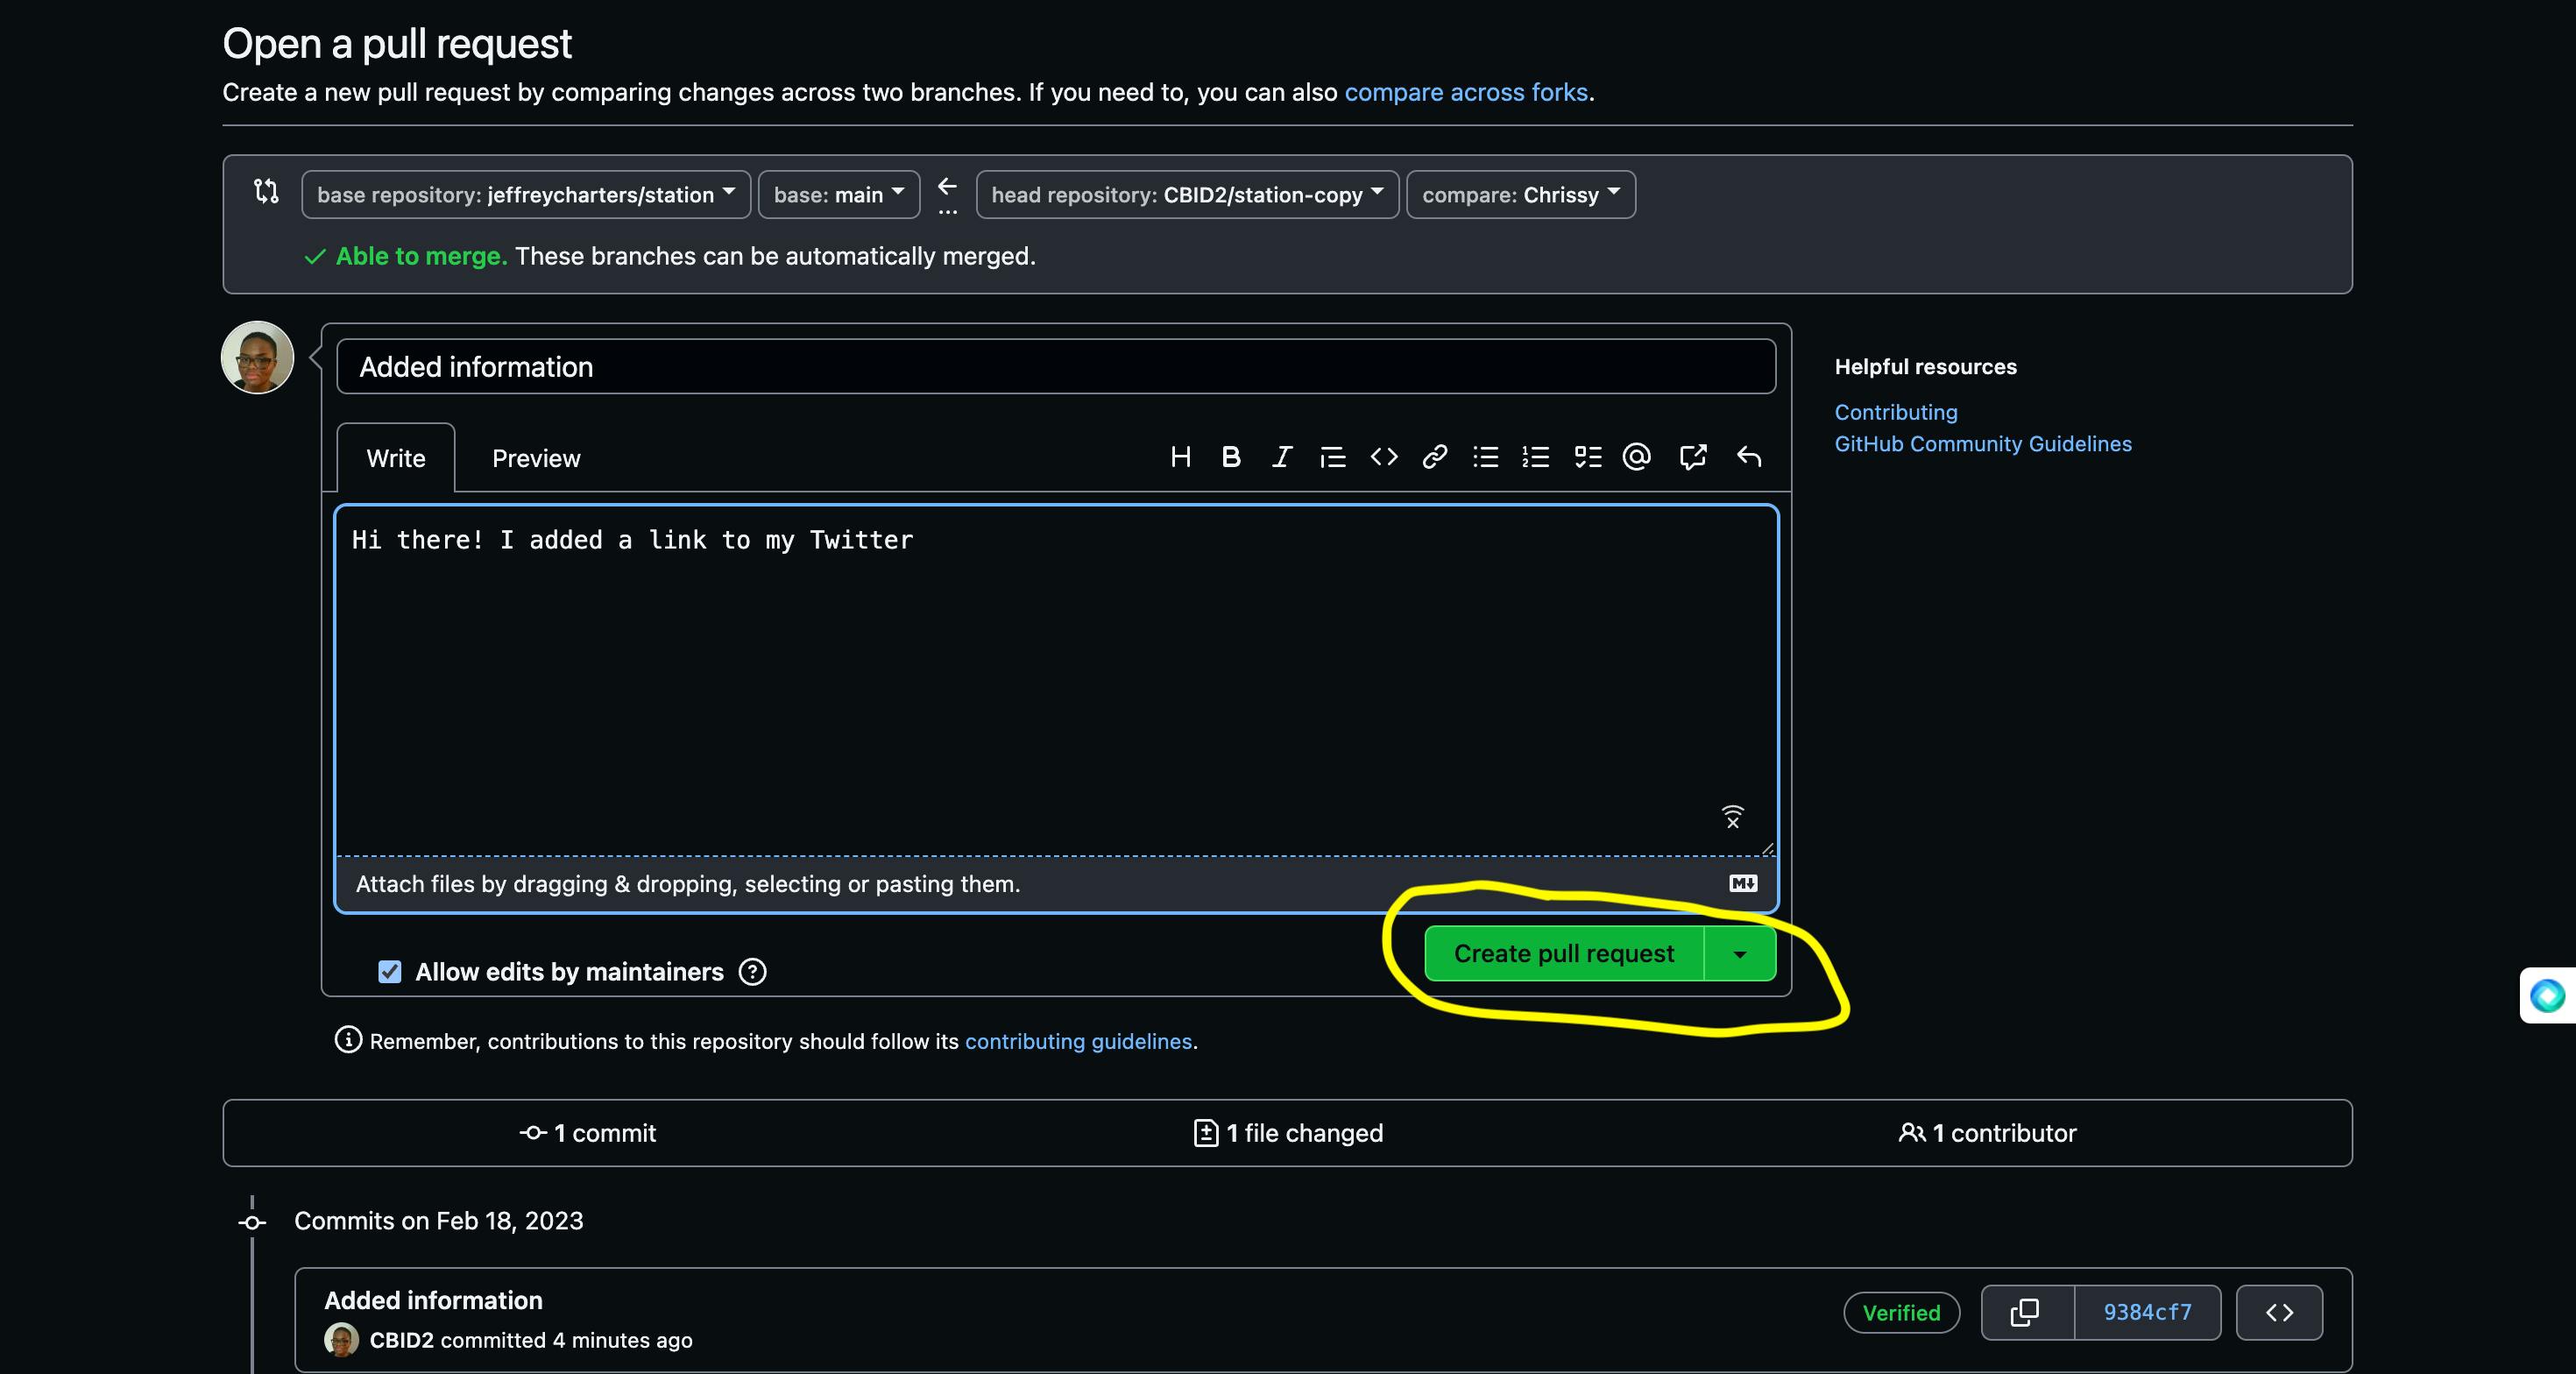
Congratulations, you're now a pull request pro! But before you start PR-bombing every open source project out there, let's cover some best practices to make sure your contributions are effective and appreciated by the project maintainers. So, let's dive into some essential PR dos and don'ts!
PR Do’s and Don’ts
DOs:
Use a descriptive title that summarizes your changes.
Reference any relevant issue numbers in your pull request description.
Add screenshots or other visual aids to help explain your changes (if applicable).
Refer to the checklist shown on your pull request to ensure that you have completed all necessary steps.
DON'Ts:
Don't make overly large or complex pull requests: it's better to break changes down into smaller, more manageable chunks.
Don't make stylistic changes that are unrelated to the main purpose of the project.
Don't disregard any code formatting or style guidelines set by the project maintainers.
Don't forget to test your changes before submitting the pull request.
Remember, following these do's and don'ts will help you avoid the dreaded 'rejected pull request' club and earn you some serious open source street cred.
Conclusion
Congrats, you made it to the end of the article! :) Now, go put that knowledge into practice by contributing to these three projects:
If you need more tips, follow me on Hashnode and check out my other links on BioDrop.
Credits
3 2 1 Waiting GIF by Funimation
GitHub Pull Request Diagram by Crunchify
Level Up Glu GIF by Ground Level Up
Looney Tunes Nothing to see here GIF by Heck Yeah Reactions
Willow Smith GIF by Red Table Talk

